
How to VR Room Setup: Step-by-Step Installation Guide
Share
🌟 Why VR Room Setup Is the Next Evolution in Modern Home Design
Imagine stepping into a room that doesn’t just house your tech—but enhances every moment within it. Whether you’re gaming, working out, or meditating in virtual landscapes, a well-designed VR room setup is about more than just hardware—it's about elevated spatial design.
As VR becomes more integrated into everyday life, urban homeowners—from New York to Austin—are turning tiny gaming setups or corners of their living rooms into full-blown immersive hubs. But to truly enjoy the experience, your space needs to support comfort, safety, sound, and style.
In this guide, you’ll discover how to create a luxury-caliber VR room setup that’s not only functional—but also beautiful, future-ready, and signature Viva Vanity.
🔧 Tools & Preparation Checklist
Before you dive into headset calibration and sensor syncing, let’s lay the groundwork.
🛠 Essential Tools for Setting Up a VR Room:
-
Measuring tape (to define safe zones)
-
Wall hooks or mounts for sensors/lighthouses
-
Cable organizers and clips
-
Rug grips or anti-slip floor pads
-
Power strip with surge protection
-
Optional: blackout curtains or acoustic panels
🧺 What to Prepare in Your Room:
-
Clear a minimum of 6.5 ft × 6.5 ft (more is better)
-
Remove sharp-edged furniture
-
Ensure strong Wi-Fi or Ethernet access
-
Identify where cables will run (especially for PC-tethered headsets)
-
Position light sources away from sensors
💡 Want a pink gamer room vibe or a minimalist tech den? Use smart lighting + soft-tone furniture to build a cohesive aesthetic.
🛠️ Step-by-Step VR Room Setup Guide
1. Choose the Right Space
-
Ideally a dedicated room or corner with open floor space
-
Avoid rooms with lots of glass, mirrors, or shiny surfaces that interfere with sensors
2. Define Your VR Play Area
-
Use manufacturer guidelines for safety zone sizing (Meta, Vive, etc.)
-
Mark boundaries using rugs or LED strips
-
Remove low-hanging lights or ceiling fans
3. Mount Sensors or Place Tracking Stations
-
Use adhesive wall mounts or mini tripods
-
Position diagonally across from one another for wide-angle coverage
-
Make sure sensors are not blocked by furniture
4. Plan Cable Management & Power
-
Use cable sleeves, zip ties, or TaskRabbit IKEA assembly accessories to hide cables
-
Add surge protection for all power connections
-
Consider wireless headsets to eliminate tethers
5. Choose Furniture for Function + Flow
-
Use IKEA furniture assembly for modular pieces if budget-conscious
-
Select smart storage units to hide gear
-
Include seating like low-profile ottomans or a rotating gaming chair
-
Elevate with Viva Vanity’s smart furniture designed for minimal interference and elegant finish
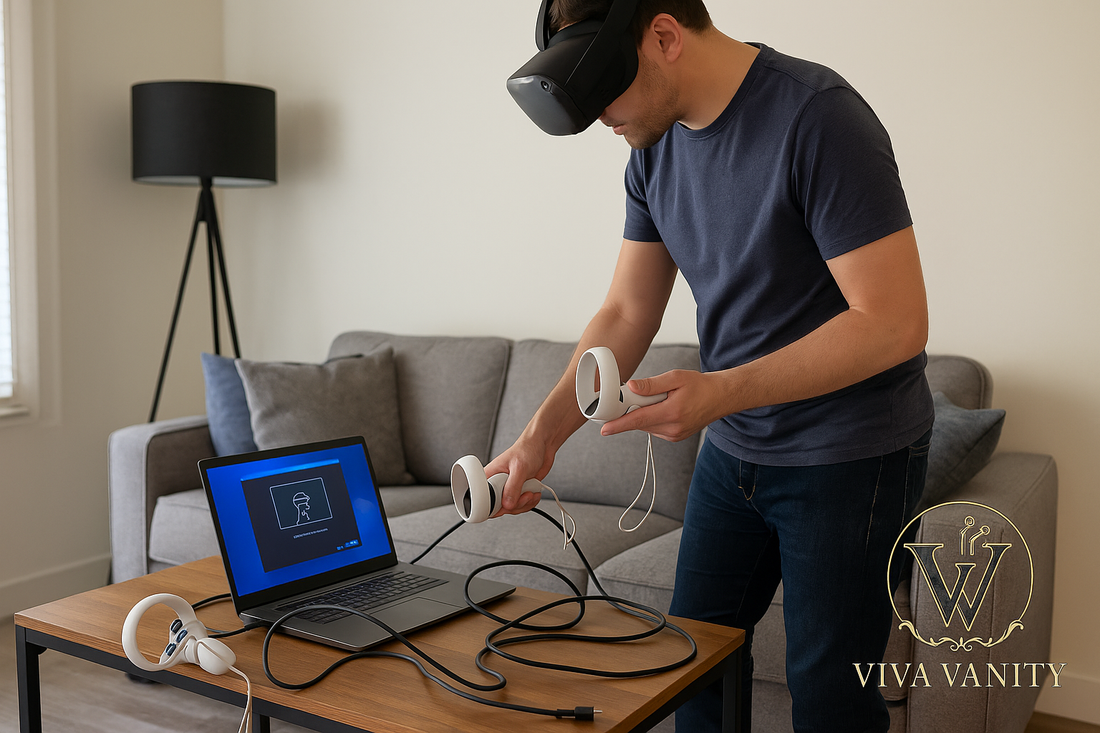
6. Setup and Calibrate the System
-
Follow headset-specific setup instructions
-
Test field of view and room-scale motion
-
Ensure proper controller sync + audio output
7. Add Personality & Style
-
Use custom RGB lighting for ambiance
-
Decorate with themes (e.g. tiny gaming setup, retro, ultra-modern)
-
Keep it clutter-free with furniture that conceals devices and chargers
⚙️ Common Mistakes in VR Room Setup (and How to Avoid Them)
❌ Too Much Furniture
A crowded room kills immersion and invites injury.
❌ Ignoring Cable Management
Loose wires ruin aesthetics and pose tripping hazards.
❌ Using Reflective Surfaces
Glass or gloss-finished furniture can interfere with sensor calibration.
❌ Skipping Layout Planning
Poor positioning of gear leads to lost tracking or motion sickness.
🧠 Looking for help? Many users hire furniture assembly near me or TaskRabbit IKEA assembly pros to assist with furniture and cable integration.
💸 Cost Breakdown of a VR Room Setup
| Item/Service | Estimated Cost |
|---|---|
| VR headset + base stations | $300–$1,500 |
| Dedicated gaming PC or console | $800–$2,500 |
| Furniture (desk, seating, storage) | $300–$1,200 |
| Installation or furniture assembly | $150–$400 |
| Smart lighting or soundproofing | $100–$600 |
💰 Keep in mind that using quality furniture avoids future replacements—and offers a more refined, long-term design.
🪑 Viva Vanity Recommendations for the Ideal VR Space
Smart furniture isn’t just about tech—it’s about lifestyle. Viva Vanity offers options that support movement, tech integration, and visual harmony.
1. GlideHub™ Smart Media Console
-
Built-in cable routes + cooling vents
-
Pairs with PCs, projectors, or VR base units
-
Matte finish avoids light reflection
2. NovaNest™ Storage Ottoman
-
Flip-top hidden storage for controllers or headsets
-
Soft edges = safe for movement
-
Optional LED ambient base lighting
3. AxisFrame™ Convertible Desk
-
Lifts and lowers for both seated and standing VR
-
Rear ports for easy wiring
-
Elegant wood and aluminum finishes
Bonus Pairing Tips:
-
Match your VR room setup with furniture tones: dusty rose for pink gamer room, monochrome for minimalists
-
Use slim-profile chairs or stools that don’t block movement
-
Choose modular shelving for game storage + collectibles
📣 Final Thoughts: The Smartest VR Room Is One You Want to Live In
A well-designed VR room setup is more than tech—it’s a mood, a mindset, and a lifestyle.
When combined with Viva Vanity's smart furniture, you’re not just creating a gaming space—you’re crafting a living experience: minimalist, beautiful, and future-ready.
Whether you’re escaping into virtual worlds, hosting friends for VR parties, or simply winding down in a tiny gaming setup tucked behind your living room curtain—your space should look as stunning as it feels.